
By default, WordPress adds a dummy post titled “Hello, World!” and page to your site called “Sample Page” when you first install the site files.
They don’t really contain readable content and need to be deleted from your site.
The reason they come loaded on your site is so that you can see what published content formatting will look like when you try out different WordPress themes (like “skins”).
However, once you complete the steps in my WordPress installation series you’ll have other published content to use in place of those items so you might as well get rid of them now.
WordPress also uses your username as the author of posts and you want to change that so no one can easily find the login username for your site.
Remove Hello World Post
Trash and delete it
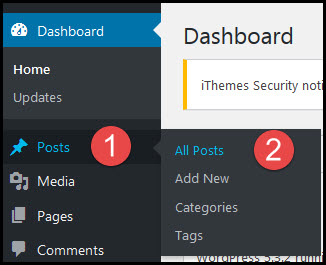
Go to Posts/All Posts in the left sidebar of your WordPress dashboard:
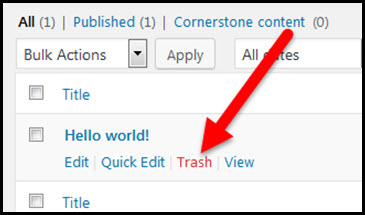
Hover over the “Hello world!” post name and click the Trash link underneath:
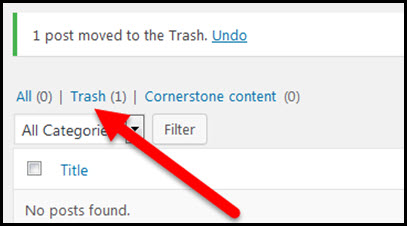
Click the Trash link to see your trashed post:
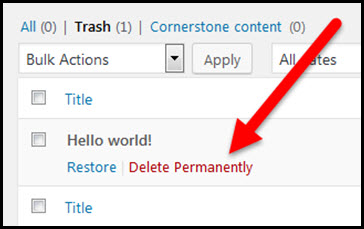
Hover over the “Hello world!” post name and click the Delete Permanently link underneath:
Remove Sample Page
Trash and delete it
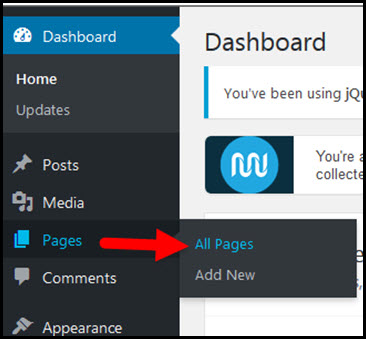
Go to Pages/All Pages in the left sidebar of your WordPress dashboard:
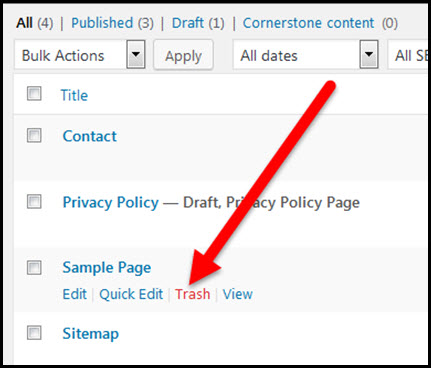
Hover over the “Sample Page” page name and click the Trash link underneath:
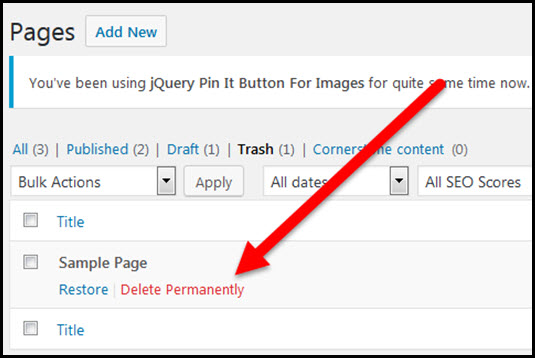
Click the Trash link to see your list of trashed pages:

Hover over the “Sample Page” page name and click the Delete Permanently link underneath:
Change Your Sidebar Widgets
Risky to leave them as-is
For some reason, the default installation of WordPress has some links in the sidebar of a new site that are risky – including, at times, links to your login URL and/or a link including your username.
A hacker needs only three things in order to log into your site – your login URL, your username, and your password. Anyone who knows anything about WordPress knows the default login URL so if they can also see your username they’re missing only your password in order to break into your site.
The sidebar of your site is made up of “widgets”. You can choose which widgets to add to control the kinds of information you display in your sidebar.
You could choose to use a search box by adding a “Search” widget. You could choose to add an image by adding an “Image” widget. You might add a “Text” widget and write some welcoming text for your site visitors.
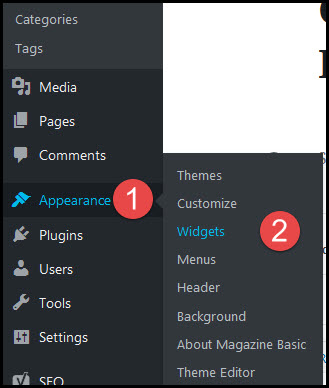
Go to Appearance/Widgets in your WordPress dashboard:
The widget screen is made up of two sections.
Available widgets you can use on your site are shown on the left. Areas where widgets can be placed on your site are shown on the right.
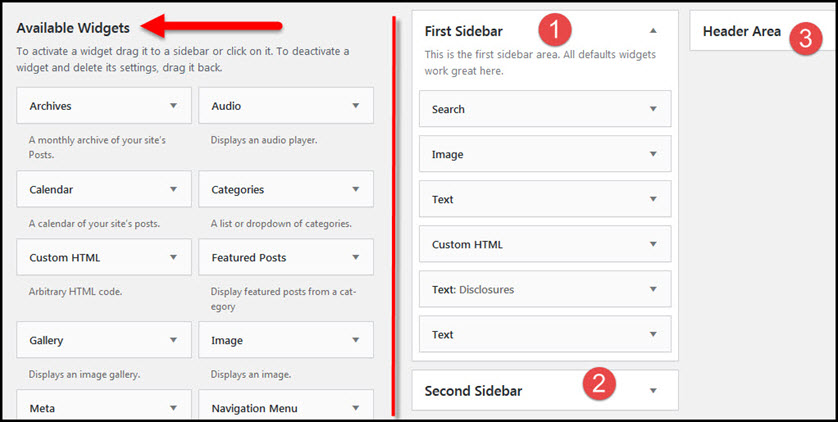
Which widget areas you see depends on the theme you’re using on your WordPress site.
In the image above the theme allows for widgets in the First Sidebar, the Second Sidebar, and the Header Area (the top of the site).
Until you are more comfortable with the direction your site is going to take I suggest using only the First Sidebar area.
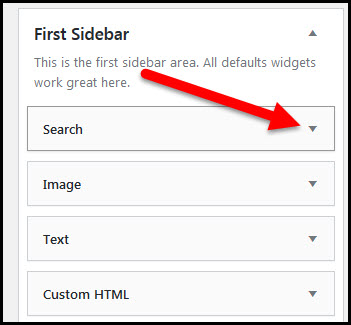
You can click the drop down arrow next to any widget in an area to expand the widget box and see more information about that item:
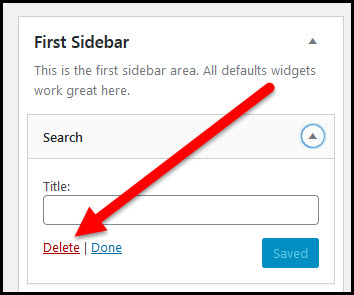
This is also where you’ll find the option to delete a widget:
You can click and drag widget items into a new position in the widget area.
You can click and drag widgets from the Available Widgets section into place in a widget area.
For a new site I recommend having a Search widget at the top of your First Sidebar.
Position a Recent Posts widget below the Search widget.
Place a Pages widget under the Recent Posts widget.
Remove all other widgets.
You can always add other widgets in the future as you grow your site.
Change Default WordPress Nickname
Hide your username
By default, WordPress uses your login username as the name assigned as the writer of your posts.
If the theme you use on your website hyperlinks the author’s name, that hyperlink will give readers your login username. Not very secure, right?!
You want to change the username showing in posts to a “nickname”.
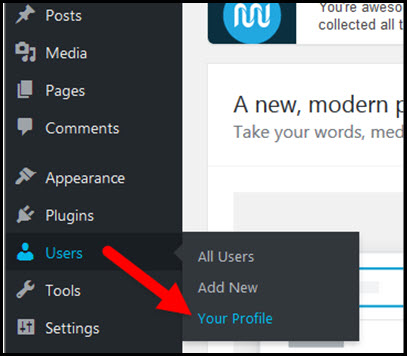
Go to Users/Your Profile in the left sidebar of your WordPress dashboard:
Scroll down to the Nickname field and replace whatever is showing in that field with the author name you want to show on posts:

Use the drop down box in the “Display name publicly as” field to select the nickname you set above:

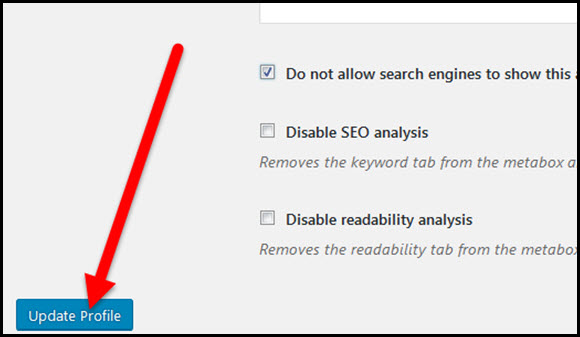
Click the Update Profile button to save your changes:
Next, you need to install and configure some WordPress plugins for security, SEO, and to adhere to common FTC/privacy laws.
